Wednesday, August 27, 2014

Ricottone aka Ricotta


Ricotta (which means twice cooked) takes me back to when I was a young boy growing up in Brooklyn NY (East NY). We ate Ricotta all the time. Eating fresh Ricotta was reminiscent of good times and great food. My Mom would buy it fresh from the Italian store all the time. We ate it quite often whether it was in desserts or savory dishes. Something I didn't know until recently was the correct terminology. I don't know when it happened or even if this is correct but I guess Ricotta made from Whey (traditional way of making it) is called Ricottone. 


Before I go into the nuts and bolts on how I made this Ricottone I want to discuss the elocution of the word Ricotta. Why would I want to discuss such a thing on my blog? Well for one thing it's my blog. In search of my cheesy reminiscent Ricotta of my childhood I came across some online chatter that ruffled my feathers and frankly pissed me off. There seemed to be a great deal of discussion on the right and wrong way to say certain words. Most pertained to Italian words for foods. The chatter focussed on the Jersey/New York way of talking. The blogs and articles I read were positive, funny and at other times extremely judgy. Some approached this subject linguistically and felt the East Coast way of talking was improper and showed a lack of education and understanding. That kind of talk irritated me. Of course a few choice words popped into my head but I will refrain from sharing. So, I say Tomato you say To-may-to in other words who cares. I grew up in Brooklyn and we say things a little different liken to the rest of the world. If you ever feel the need to correct someone's phonetics you need to stop right now because you are acting like an ASS!! 

Yea, yea I am venting a bit. Just one of my pet peeves. When I moved out to the Northwest I quickly learned that my pronunciation of certain words was different than the average Washingtonian. According to Websters Dictionary Ricotta is pronounced Ri-cot-ta (Re-caught-uh). The way I say Ricotta is; with a rolling "Rrrrrr" I say "Ree-gawt" or "Ree-gawta".  And if you ask me my pronunciation of Ricotta sounds damn cool. When I first arrived in WA and not knowing any different I would use my special Brooklyn way of talking and undoubtedly and without any clue what was happening I would get this questionable long stare. They would would break the long silence and stare with "What did you just say?" As if I was speaking a different a language. To my knowledge they were not being rude but sincerely did not know what I was saying. I was unaware that there were other ways to say the same word. Here are some common words I used as a kid... ..Mozzarella = Moot-za-dell,  Prosciutto = Pro-shoot, Capicola = Gabagol, Cannoli = Ga-nol-lee and finally Macaroni = Mac-cher-roni.  At the end of the day it really does not matter.  

You're looking at 6 Gallons of Milk Whey. The Whey is the byproduct of my Cheesy quest to make Beer Cheese. Ricotta means recooked which I will do to make Ricotta aka Ricottone. Long story short, after most of the protein is extracted from the milk (mostly casein) in the form of curds you are left with Whey which is mostly albumin.

The remaining whey needs additional fermentation (more acidity) in order for us to harvest the additional proteins we know as Ricotta. You can accomplish this naturally by introducing a culture, or waiting an unknown amount of time for the ripening to take place or introduce an acid such as Citric Acid.  

With the lower PH and high temps the protein denatures and causes a fine curd to form on top which can be scooped up and placed in a mesh, or cheese cloth or mold like I did.   
So here is what I did. Heat the milk to 160 F. This kills any remaining rennet which prevents early coagulation. Optional- At this point add 5% - 25% or of milk or cream to improve richness and yield.  I have come across recipes that uses 2 parts whey and 1 part cream or milk.  Keep heating to 170 F and add 1/2 tsp 2 tsp of salt per gallon of liquid (.25% of weight). I used 1 tsp per gallon and it tasted great. Raise temp of whey to 185 F and when you start seeing curds float at the top add citric acid. Mix a 1/2 tsp of citric acid per gallon of water with distilled water and add to vat and whisk vigorously for 15-20 seconds. You will know if you added to much citric acid if curds sink to bottom. As the curds start to form use the ladle  to move curds gently from the sides to the center. The curds will start to stick together to form a solid mass. The color hopefully will turn green and the curds will float. If they don't sink it means you got it right. Let the curds rest in the whey for 10-15 minutes which helps ensure better quality Ricotta. Gently ladle curds into draining forms. Now if you want a light version of Ricotta drain less and of course if you want a denser version drain longer. 


Monday, August 11, 2014

"Udder-ly Milk"

So on my journey to cheesy knowledge it became apparent that I didn't know anything about milk. Somewhat problematic if you want to make good cheese don't you think? The well known saying
"You Got Milk?" popped into my head and I was forced to admit to myself I know nadda about milk hence "I don't get milk"....yet.

After my first Mozzarella experiment I knew right away I was missing a vital ingredient namely milk. What, what did I say? Yes, I said I need milk to make cheese; but what exactly do I mean? Although Milk is a necessary component for cheese making the reality is most milk sold in supermarkets today is not adequate for cheese making.

To make good cheese I had to understand the quintessential element in cheese making....namely MILK.

After my second attempt at Mozzarella I knew I was on to something. After some research and emails I found the perfect milk for cheese. I know I am getting ahead of myself but I am so happy I found the perfect milk for cheese called Jersey Milk. I also found a local Dairy farm Twinbrook Creamery that produces this perfect milk for cheese. 
Twinbrook Creamery raises purebred registered Jersey Cows. What does this mean to the cheese maker? Well for one thing your cheese will cost more but you will have amazing cheese provided your techniques and skills are adequate. The cost is of no consequence if you love the art of cheesemaking. Making your own high quality cheese should be a hobby and not a way to save money because that's not going to happen. Jersey cows supply a higher protein and butterfat content that will immeasurably enhance anything you make with it namely cheese. Sorry for the digress......The Twinbrook dairy farm is amazing and somewhat unique. They use no synthetic hormones that artifcially enhance milk production. This farm does not use commercial fertilizer or pesticides so these cows feed naturally in an almost perfect environment.

Deciding to write on this subject had me contemplating a starting point. Where do I start? I mean everybody knows what milk is.......don't they? Heck, after I did some preliminary reading on the subject I soon realized that it would be presumptuous of me not to start at the beginning because I obviously know nothing. If the reader of this blog is anything like me they probably know very little about milk. A more likely scenario is the reader thinks they know Milk but in fact they don't.


Ok lets start.... milk comes from animals. I am glad that's over now we can move on. I wasn't breast fed. Just making sure you're paying attention. 

For the cheese maker Milk is an essential component of cheese making...Duh it's the star of the show. Most of us don't understand how important milk is in cheese making until of course we try making homemade cheese. When I was a kid the shelf life of milk was about 3 days and it came with all this fat on top (non-homogenized). I never knew why until recently. Generally speaking the average container of milk at the store will not serve as a good canvas for a cheese artist.  
These are some things to ponder before making cheese. 


Should we use Homogenized milk for cheese? What is Homogenized Milk? For a detail info on Homogenized Milk click the link. That cream on top of the bottle indicates that the milk is non-homogenized. Homogenized milk is an emulsion of soughts where the fat in milk are forced through narrow openings at very high pressure reducing the size of fat globules into tiny tiny particles. These tiny particles can no longer clump back together hence the milk becomes Emulsified or the techno term Homogenized. Oh yea before I forget Homogenized milk has a longer shelf life. 
Cheese made with Non-Homogenized milk produces better taste and texture than cheese made with homogenized milk. At least that is what I have read. I have no personal experience with this of course. I am still an extreme newbie and will remain this way for a very long long time. It takes years to become a good cheese maker and I have only just begun to understand cheese making.

How about pasteurization? Yes, this too has an effect on cheese. I won't go into all the specifics but will cover just a bit. For a detailed explanation click the link. Simply put, pasteurization is a process in which milk is heated to a specific high temperature (kills unwanted microbes and some good ones too), cooled quickly than bottled. This enables milk to remain fresher for a longer period time and this slows down microbial growth that causes spoilage. The higher the temp the worse it is for cheese makers. This is why I buy my milk for cheese-making from Twin Brooks Creamery. They Pasteurize their milk on the lower spectrum 145 f for 30 minutes and of course their milk is non-homogenized. 

All the milk at your local grocery shelf is pasteurized (unless it's raw which is unlikely). What you don't know are the specifics of how they pasteurize their milk.

Based on my preliminary research there are several ways to Pasteurize milk. 

Pic "A" Curds from low Temp Pasteurization of 145F 


The best one for cheese making is the Low Temperature option. Milk is heated to 145 F then held at this temperature for 30 minutes. The High temp option is 162 F which is held at that temperature for 15 seconds. 


Pic "B" High Temp Pasteurization
There are dairies that have upped it a bit to 172 F to increase shelf life. Don't bother looking at the Milk label because it won't tell you which option they're using. You might be able to put the puzzle together by looking at the expiration date and knowing when the milk was delivered. Lets not forget about Ultra-Pasteurization (UP) which is just horrible for cheese making. They heat (cooking if you ask me) the milk at 191-212 F and the times that the milk is held at these temperature are a mystery. Good luck reading the labels too. UP should be on the box but from my reading the label is actually smaller than the standard one. Buyer beware. Lets talk about the milk that is only good enough to wet your lips and pour over your fruit loops. It's known as Ultra High Temperature Sterilization (UHT). UHT milk is heated to an ungodly temp of 280 F for 2 seconds. This milk can last 60 days!!! and can be hauled on a ship for a Gilligan Island fateful trip. Again maybe good for cereal and most likely your coffee but that's all. Picture "A" is my Jersey Milk Mozzarella and Picture "B" is my first Mozzarella. Do you notice the difference in the curds? The Jersey milk Mozzarella came out great compared to the other milk. The other milk was labeled Pasteurized but there was no telling what temp they pasteurized the milk at. Don't even bother asking me about Lactose free milk for cheesemaking..........Not going there. 


You like yellow cheese? When I was a kid I thought all cheese was yellow. Only inferior cheeses lacked that beautiful hue of yellow. Do you know the mystery of yellow cheese? It's actually no mystery at all but has to do with a vitamin you probably take as a supplement. It's all about Beta carotene and grass. Grass contains the antioxidant Beta Carotene which is responsible for the yellow pigment in cheese. They started dying cheese in the 16th century to achieve more consistent results. Here is the skinny.....Spring and summer yellow cheese and fall and winter white cheese. How do we solve this problem? Cheese-makers used a vegetable dye called annatto which is still used to this day. 


Saturday, August 2, 2014

"The Laudable Mascarpone"

In my humble opinion Mascarpone Cheese is the king of high butter fat tasty cheeses. It's probably the most versatile cheese you could ever use. I have used it in desserts and savory dishes. Mascarpone cheese is great no matter how it's used. 

We all know that Mascarpone cheese is used for the famous Italian dessert Tiramisu. Tiramisu means lift me up or pick me up in Italian and I would have to agree. Tiramisu is by far one of my favorite desserts and I hope to write about it soon. I will attempt to come up with a version not seen by anyone which will include homemade ladyfingers or a version similar. 

This was my first attempt at making this wonderful cheese and for my first time out I did rather well if I do say so myself. For all those reading this that do not know anything about this wonderful cheese allow me to tell you a little about the King of butter fat cheeses. The cheese originated in Lombaridia region of Italy. This cheese is the king of all high butter fat cheeses and can be a double or triple-creamed. Some have compared Mascarpone Cheese to cream cheese and although there are similarities they're different. Cream Cheese is to Mascarpone Cheese as a Marathon runner is to the Sprinter. There is no comparison. 

I came across several recipes for Mascarpone cheese but there seems to be only two recipes or rather two techniques to make this glorious cheese. One version uses and acid normally tartaric and it's heated to 185-195 degrees. 


The other method is my personal preference in which you introduce a bacteria culture to the milk and ripen your cheese naturally. The cream is heated to 86 F, culture is introduced and after a 10-12 hour wait at room temperature you have Mascarpone cheese. 

 Twin Brook Creamery


I used whipping cream from Twin Brooks Creamery. I won't go into all the juicy stuff about this farm but lets just say this is very high end stuff. Jersey cows, organic, hormone free etc etc. This is the creme de la creme of farms in the Northwest for cheese makers. 


Following the instructions meticulously I took the cream to 86 f and stirred in the culture.  


After twelves hours sitting at room temp I had Mascarpone Cheese. What's kind of funny about this step was I have my air conditioner on and I keep my house extremely cold so I had to heat a separate room in the house just for the cheese to ferment.  


I decided to split up the mascarpone cheese in half. This is the half that sat covered in a bowl for about 6 hours. Amazing texture!!!


I put the other half in cheesecloth and nestled it over a colander and let it sit for 6 hours to drain off excess whey in a refrigerator. This step will make a denser cheese. 


Out of the cheesecloth and ready for the step. 


 We were going over to some friends for some Mexican Dominos and I decided to convert my cheese into a dip. I added just a hint of sugar to kick it for all three dips but you could have added any sweetener to this cheese.

First dip was the all natural Mascarpone cheese undrained of extra whey.

Amazing is an understatement. Very, very smooth. 

This is my Mexican style Mascarpone dip in light of the game we were playing. A mojito dip!!! Yes it had a hint of tequila, lime and other species in it.  Awesome!!
  
This is the Asian version. Chives, Sesame seed oil and traditional Asian species. Out of this world.  

I think you can add anything to Mascarpone cheese and it will taste good. Draining the extra whey is a personal preference and all the dips would have been fine without this extra step.


After making this cheese I had a brief conversation with a cheese guru and she mentioned she likes Mascarpone cheese made with Jersey Cows but using their 1/2 and 1/2 and not their whipping cream.  

So this made me think about fat content. I wrote Twin Brooks creamery and they told that their Half and Half and whipping cream are processed the same way and the only difference is their fat content. The whipping cream is 40-41% butterfat and the Half and Half is 12-13% butter fat. Next time I make the cheese I will play around with percentages. I.E maybe 1 pint of whipping cream and 1 pint of Half and Half which will average out ot 26-27 %. Anyhow it is fun to experiment.  


Gratuitous pictures below...


Tuesday, July 8, 2014

Jersey Mozzarella

My Cheesy quest for the perfect cheese has "shepherded" me to Twinbrook Creamery
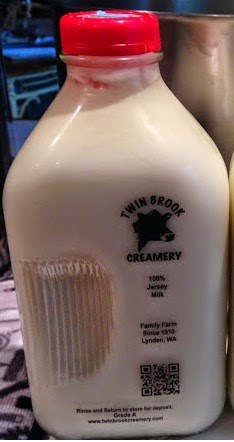
Twin Brook Creamery raises purebred
registered Jersey Cows. What does this mean to the cheese maker? Well for one thing your cheese will cost more but you will have amazing cheese. Jersey cows produce milk with a higher protein and butterfat content that will immeasurably enhance anything you make with it namely cheese. This farm is amazing. They use no synthetic hormones that artifcially enhance milk production. This farm does not use commercial fertilizer or pesticides so these cows feed naturally in an almost perfect environment.
  

So now that I have the perfect milk for my cheesy quests I should be able to make some better than average cheese, at least I hope so. As always there is a learning curve to cheese making and it's not only tied to your technique but the particular milk you might be using. This milk should jump start my cheese making a bit so I am going to attempt Mozzarella once again and lets hope I have superior results. BTW- This is the fast way to make Mozzarella..... and some call it 30 min Mozzarella but don't believe them it takes longer than that. Basically using an acid and rennet. The traditional way is way more complex and that will be one of my next projects. My first attempt at Mozzarella can be found HERE

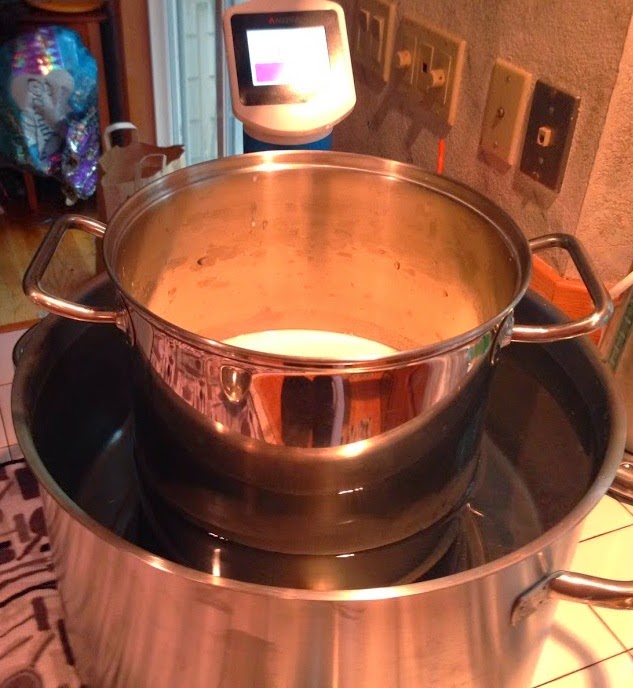
I just had to post this picture of the milk being poured into the pot. It looks, smells and taste superior to anything I have ever drank.  

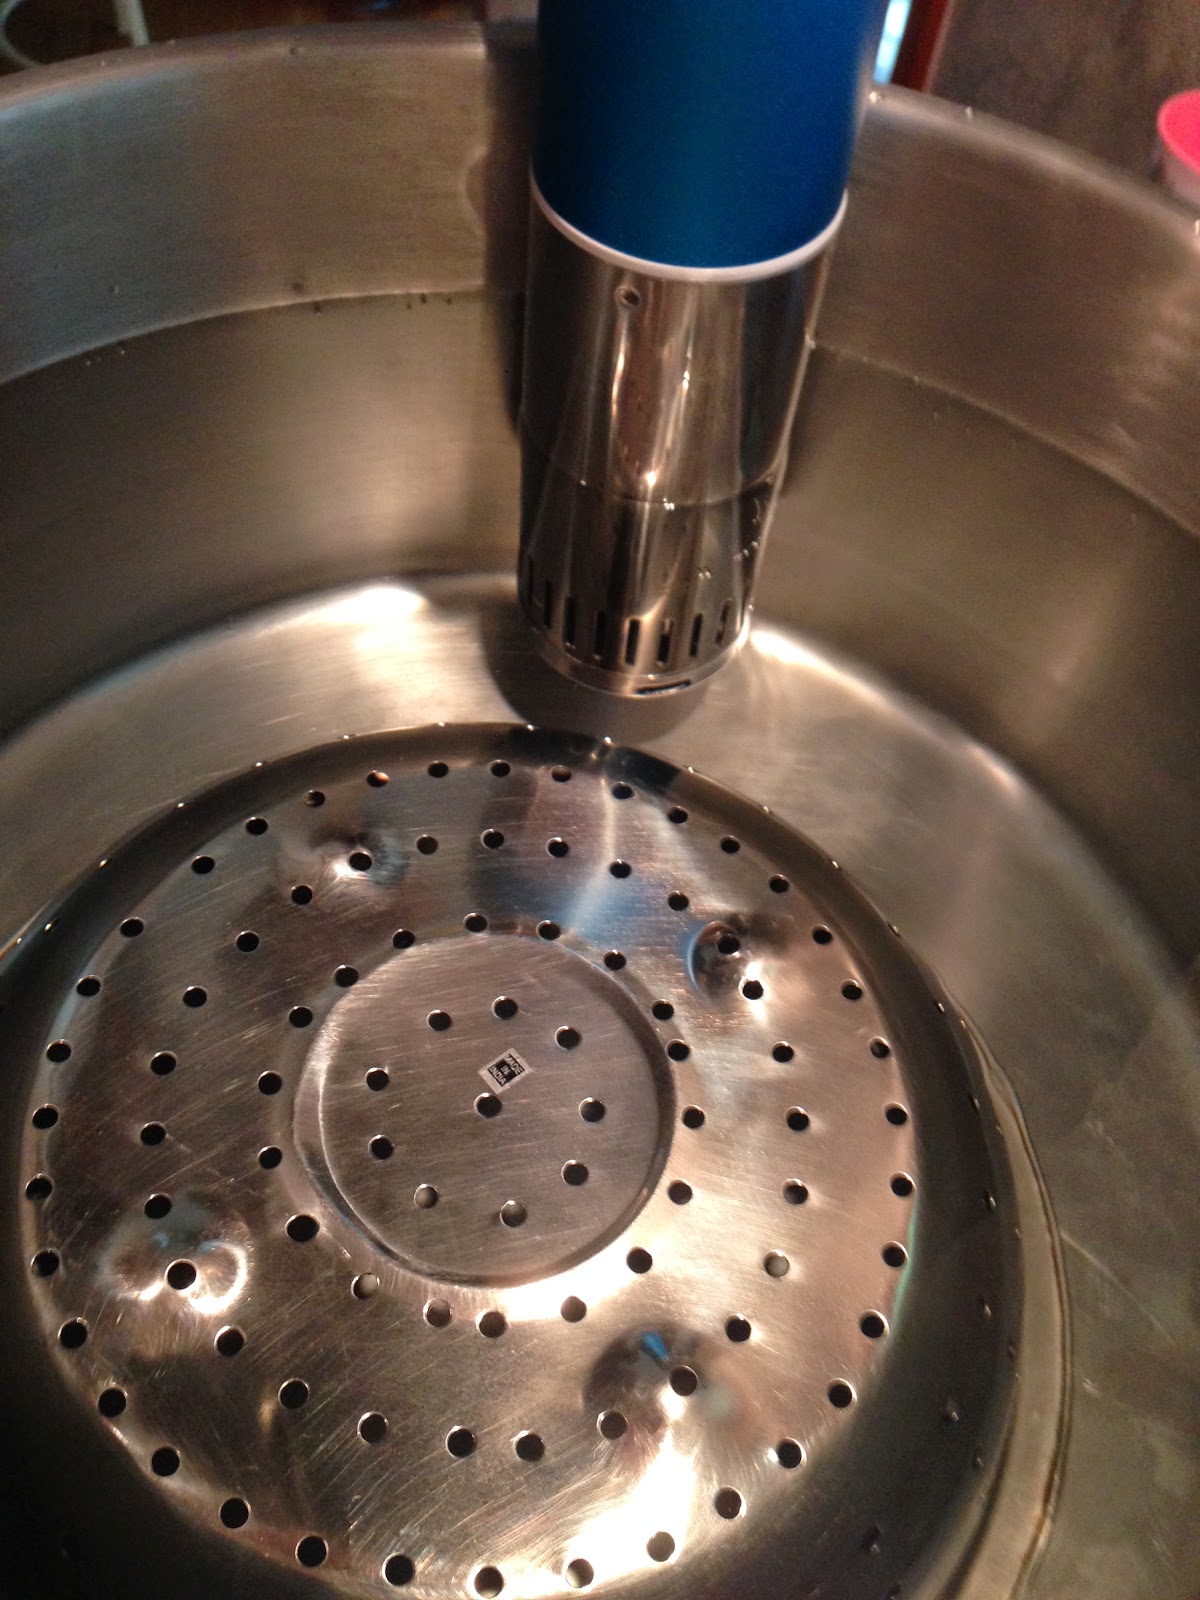
Anyhow if you look at the picture to the left I decided use my 40 Quart Stock pot with a large colander on the bottom to support my Milk holding vessel. I also attached a Sous-Vide Machine which will help give me precise control over the water temperature. Raising the temp of the milk slowly is very beneficial to cheese making. 
 

Better pictures of my setup.


Following instructions meticulously to ensure success....maybe. 
  • First thing I did was to dissolve 1/4 of the rennet tablet in 1/4 of Chlorine free water. 
  • Mix 1 1/2 tsp citric acid into 1 cup of water until acid is dissolved. Pour mixture into large pot.
  • Add 1 gallon of milk to the pot and stir vigorously with slotted spoon while
    heating milk to 90 degrees. 
  • Take pot off the burner. Slowly stir in the rennet with an up and down motion with the slotted spoon for approximately 30 seconds. 
  • cover the pot and let sit undisturbed for 5 minutes. If after 5 minutes the cured is still soft and whey is too milky let if for a few more minutes. (I ended up letting it sit for extra minutes.)
  • Cut the cured with a knife. Make a checkered pattern. You want to end up with even sized curds.
  • Put back on stove and slowly heat it while moving the curd with the spoon back and fourth. If you are to agressive you could end up losing flavor and the butter fat will seep out.
  • Heat to 110 degrees.
  • Take pot off burner and stir slowly for 2-5 min. More stirring will make a firmer cheese. This step may not be needed. Jury still out. I think it depends on the milk and the variables to a particular milk. 
  • Heat a pot (or whey) to 185 degrees. Ladle curds into a colander and folding them together gently toward the center draining off the whey as you go. 
  • Dip colander into heated pot (185 degrees) and using a slotted spoon to fold curds back into the center until they become stretchy. This happens when curds reach 160-170 degrees. If this step is overdone you could end up with a dryer cheese.
  • Add some salt and shape into desired shape.
  • After you have formed a ball drop into cold water to bring down temp. This cooling step is important to prevent a grainy texture.
This is what I did..............

Slowly heating water to 90 degrees. I set Sous-Vide to 110 degrees and slowly raised temp of milk. As the temp of the milk approached 85 degrees I added ice to the Sous-Vide vessel and brought the temp of the water bath down to 92 degrees and slowly raised the temp of the milk up the last few degrees very very slowly. At this point you are suppose to take milk off the heat source but all I did was lower temp of Sous-vide machine. 

At this point I added rennet and waited for the magic to happen. Wow after 5 minutes a magical thing happened. I created curds. The whey separated well into the curds. 

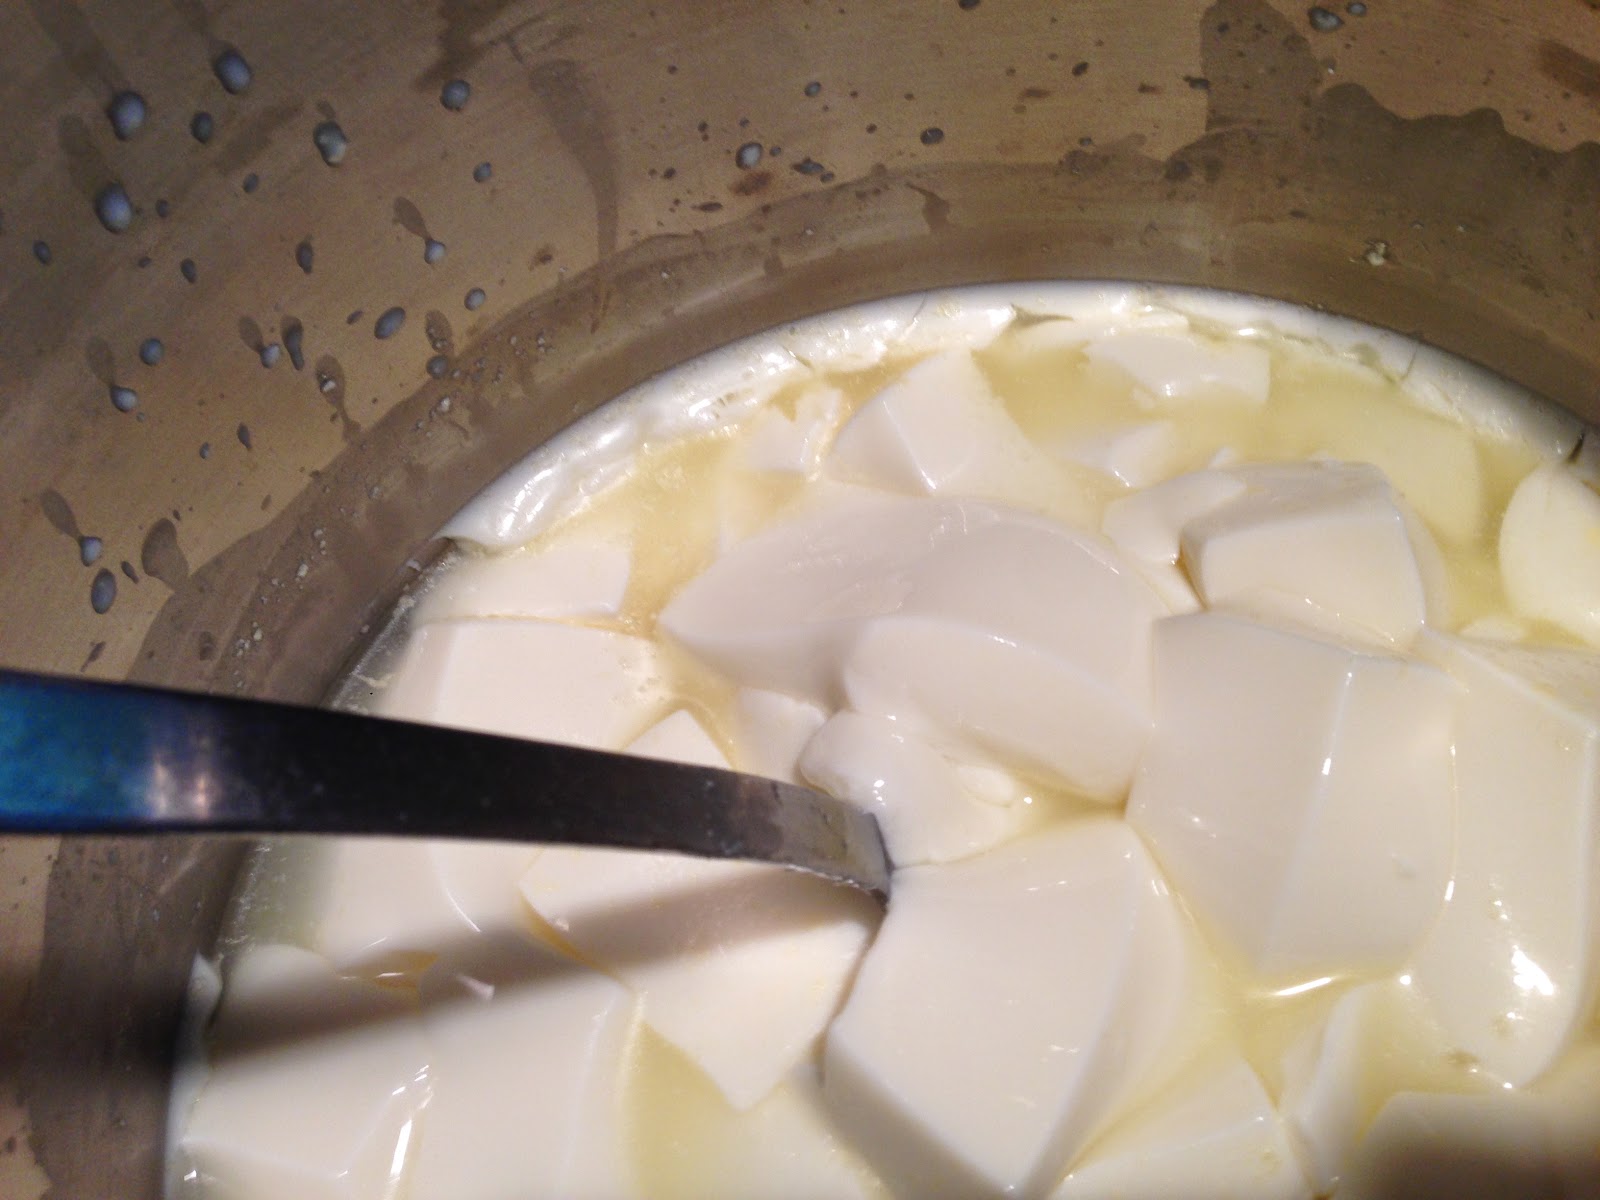
Testing the curd...I tested the curd by pulling the curd away from the pot with a spoon with the hope of curd formation and clear whey. Success. 

After the curd was formed I used a long knife and cut curd into one inch pieces using an up and down movement making sure knife reached bottom.
The next step of the process was to raise the temp of the Curd/Whey to 110 degrees while stirring. Having a Sous-Vide made this very simple to do. After the curds hit a 110 degrees I lowered the temp of the Sous-Vide and stirred for 2 minutes.


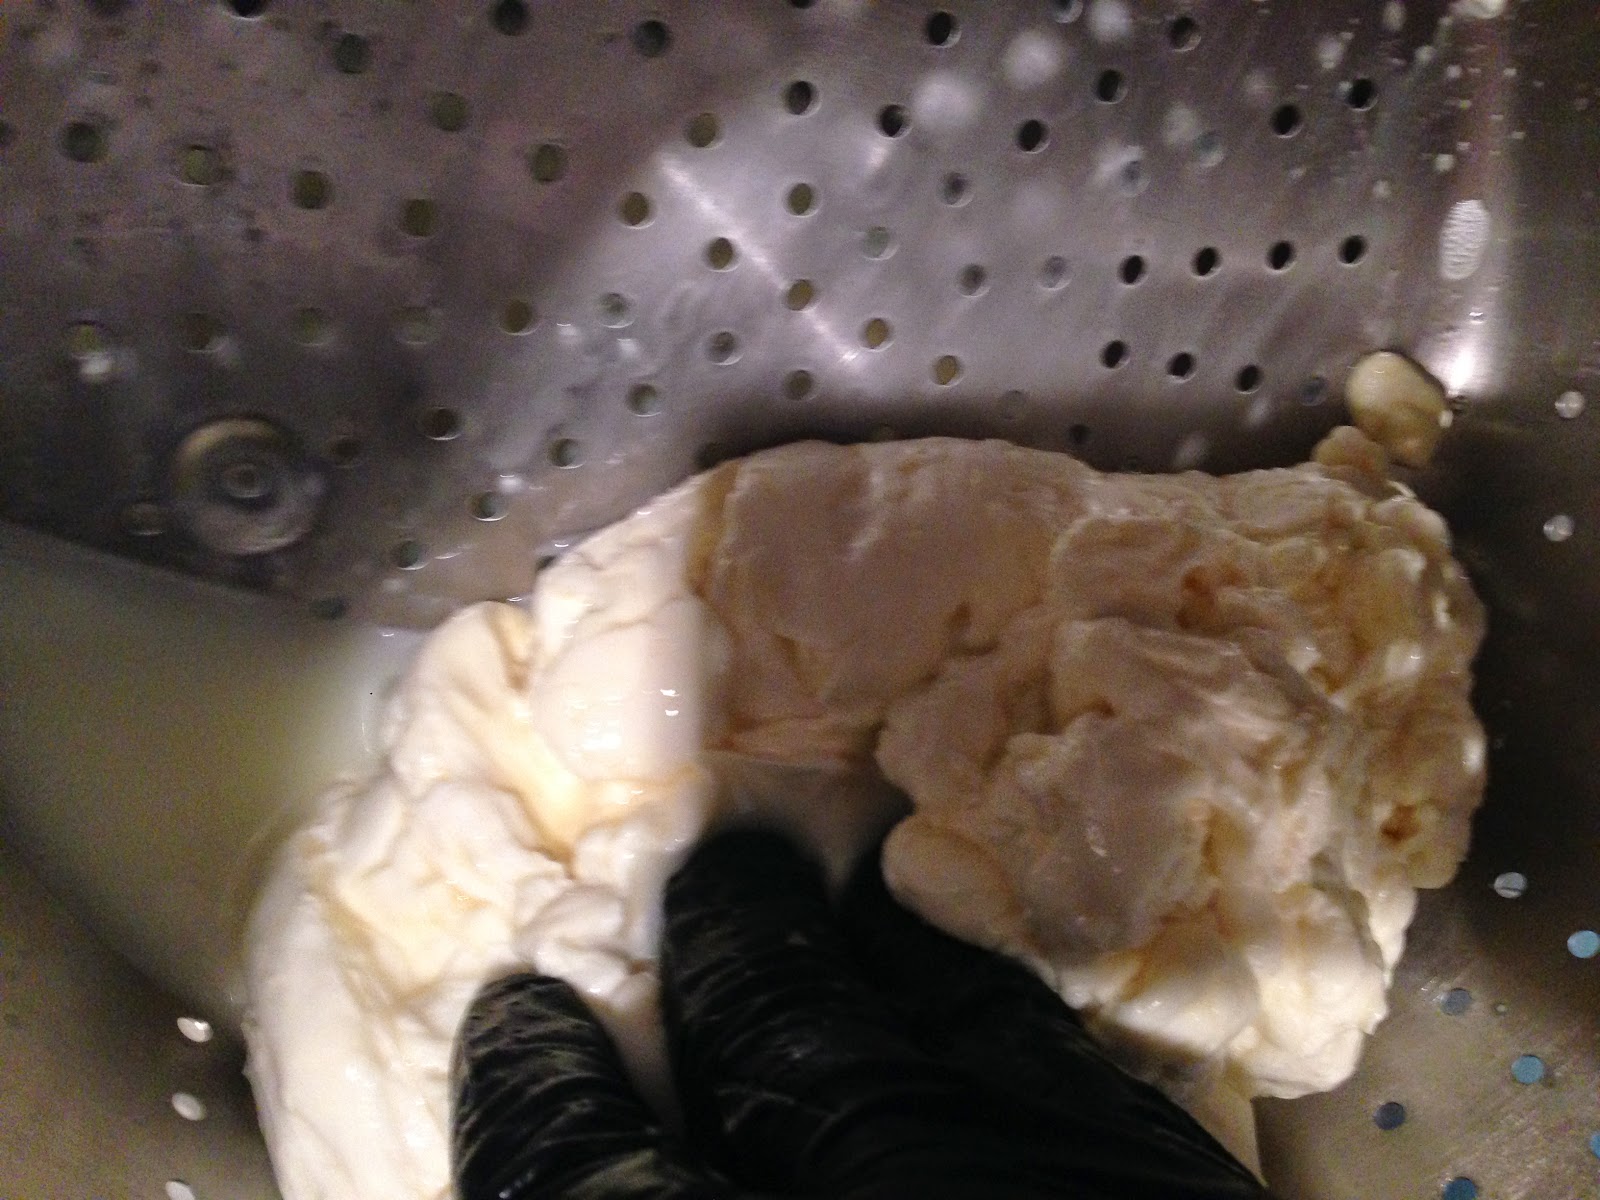
Using a slotted spoon transfer curds to a colander and drain off excess whey. Folding the curds on top of themselves helped release lots of the whey. 

I heated the pot of whey up to 175 degrees and used this to heat the curds for stretching. The curds will begin to stretch well when heated to about 160-170 degrees. After a few stretches you can form into a ball. The more you work the cheese the more likely it will become dry. Add salt during the stretching phase.


After a few stretches I formed into a ball. There were a couple of times where I had to submerge the cheese back into the water because the temp became to low and it began to tear. After it was fully heated and stretched out I formed into a ball. 


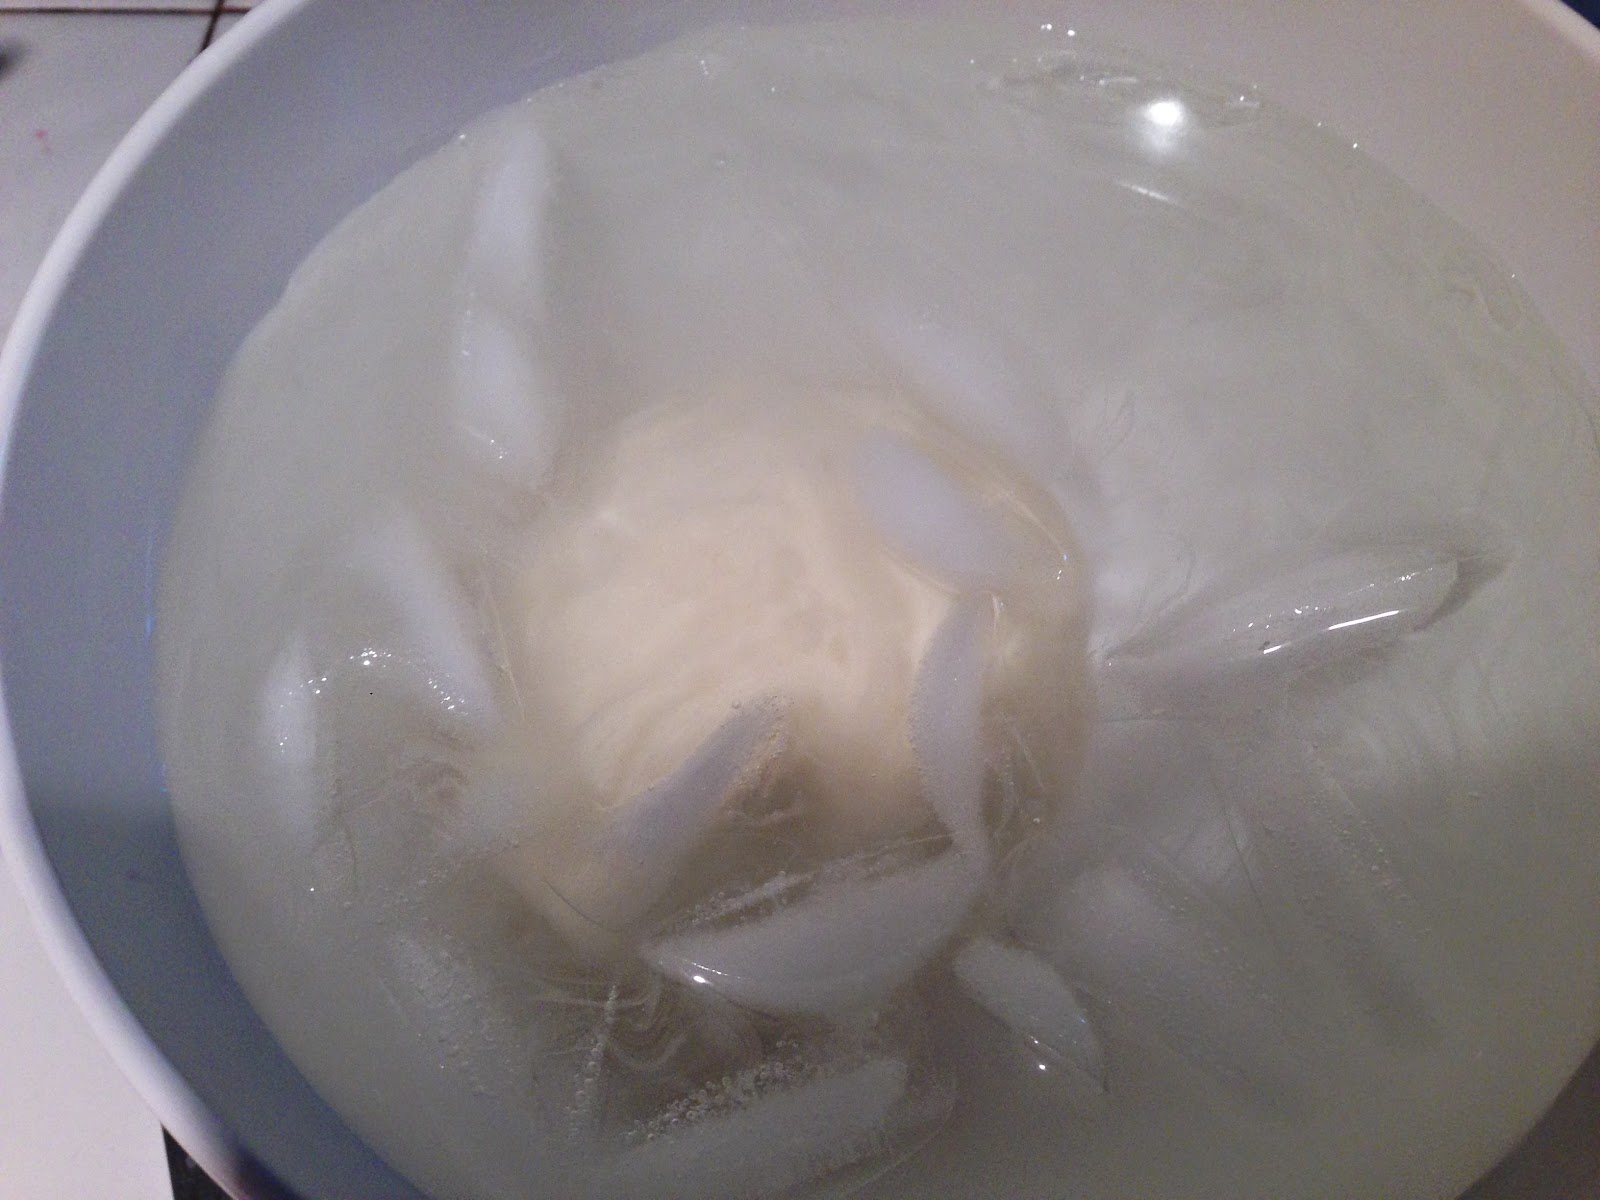
Submerging into ice bath to cool it down rapidly. This will produce a smooth consistent cheese. 


Some final thoughts- Overall this cheese was better than the first. I still have so much to learn. The curds in this cheese were 500% better than the first batch which was due to the high quality milk I used. I will never use anything other than Jersey Cow milk from now on. How did the cheese turn out? Ok guess. Flavor was decent but not great and a little dry for my taste. Some things to consider. Maybe less Citric Acid..reduce by 1/4 tsp. When the temp hits 110 do not stir for 2 minutes which will reduce the cooking hence more moisture. Less folding too will help. Back to the drawing board.